How to make a linocut effect in Illustrator
7 minute readHow do you make a linocut effect in Illustrator? In this tutorial we will be using a couple of Astute Graphics plugins to make crinkly strokes in Illustrator, giving a realistic linocut effect. We can then save this as a graphic style.
The idea for this method is to stack live effects onto a single path, and then save the Appearance Panel settings so that you can use it again and again on other paths in Illustrator.
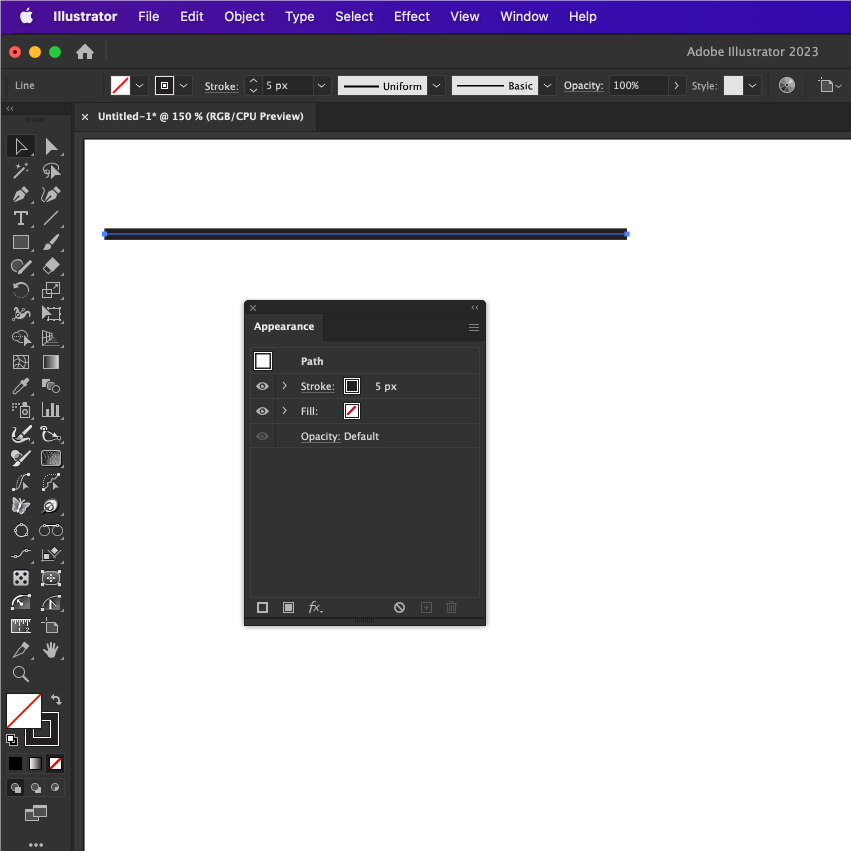
To start this process we are going to draw out one open path and have a black stroke (choose a weight you can see). The Appearance Panel should show a black stroke with a 5px weight, and no fill color.
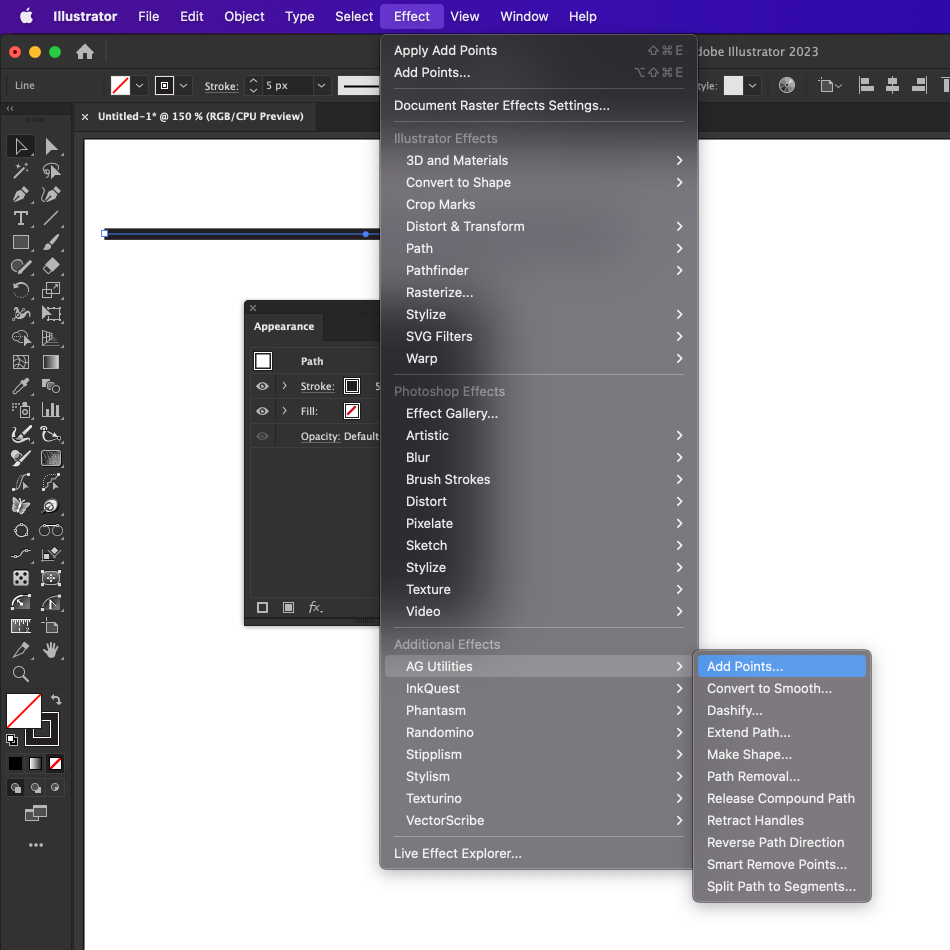
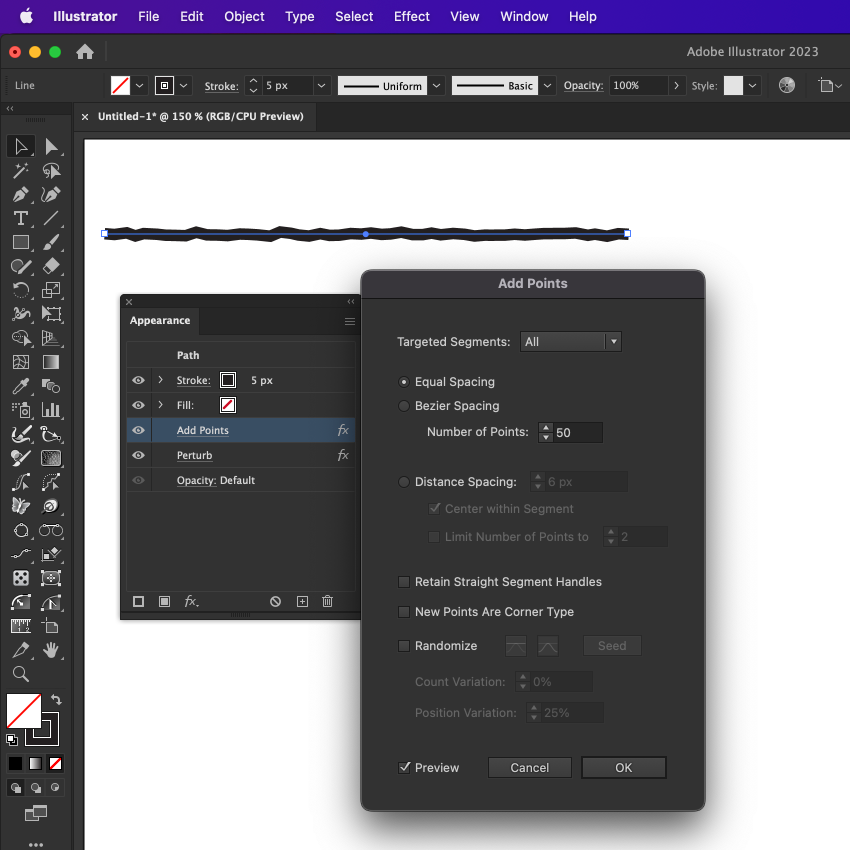
The first Live effect we're adding is the Add Points menu option from AG Utilities, which is part of the VectorScribe Plugin. To find this effect, ensure your path is selected, then head up to Effect > Under Additional Effects find AG Utilities > and in this menu click Add Points…
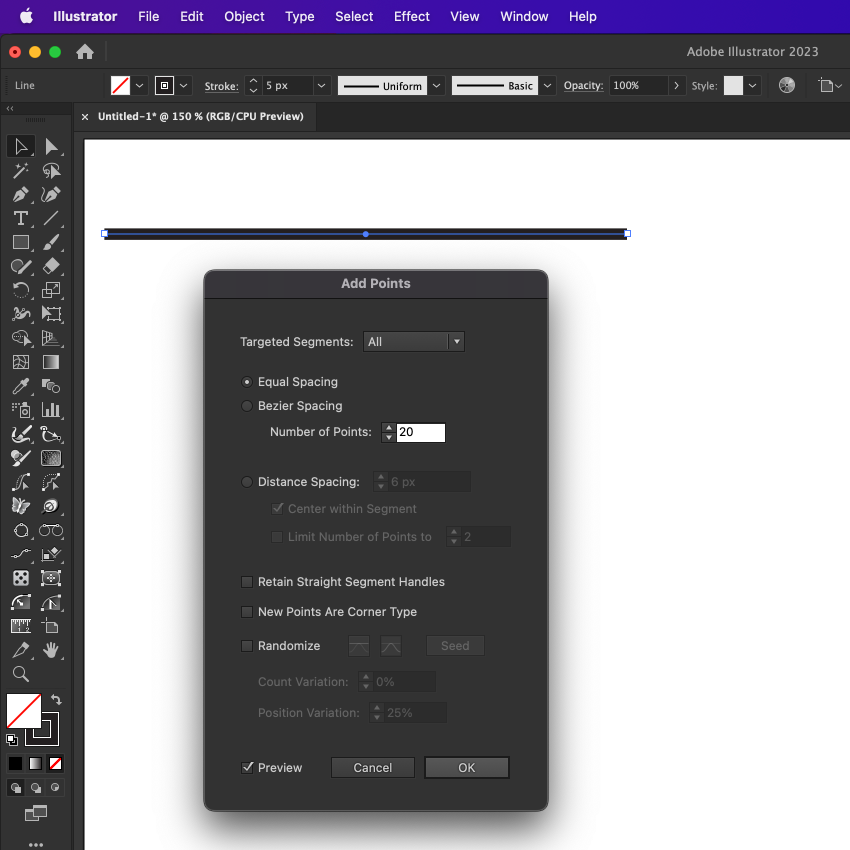
This will open a new dialog and you can now specify how the extra points are added. Choose equal spacing and 20 points. Remember, this is a non-destructive effect so we can come back to this dialog and edit it later if we need to add or remove points.
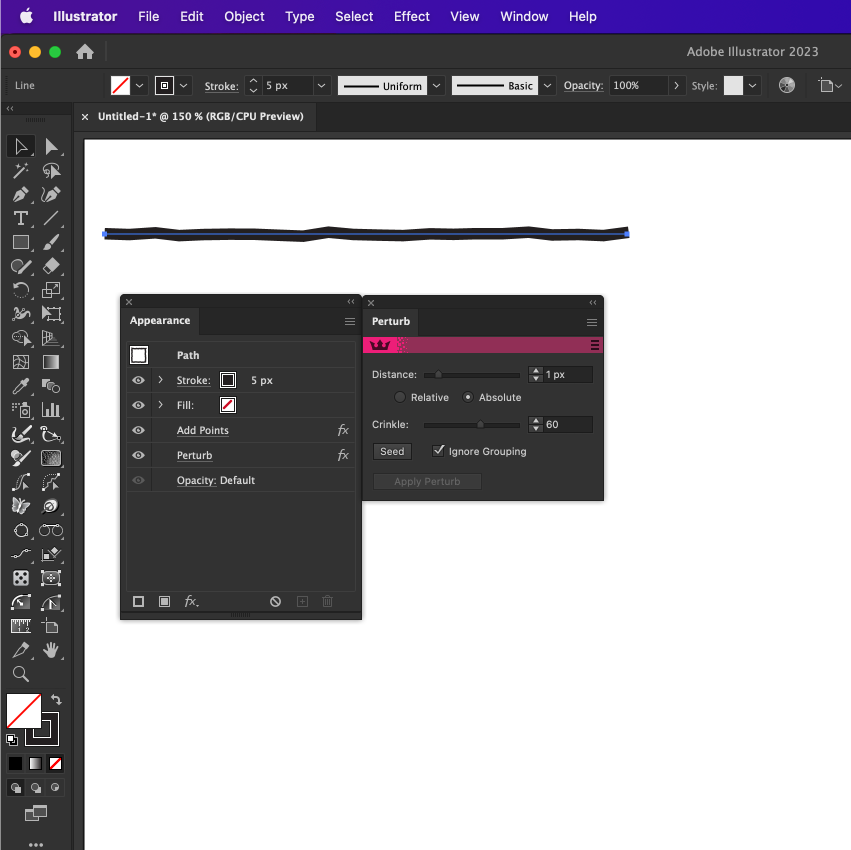
You won’t see a difference on this path, but trust us, those points are added in there. Next we will stack the Perturb Effect, which is part of the Randomino Plugin. Again, head into Effect > Randomino > Perturb… The perturb panel will open and you will also notice that the Appearance Panel now shows our stroke, the Add Points effect, and the Perturb effect.
You can mess around with the Perturb settings, but here’s a quick overview of what each setting is doing:
Distance: The maximum distance that each anchor point will be shifted (in a random direction). Either absolutely by a value, or relative to the size of the object.
Crinkle: How far the anchor point should move apart from the points either side of it. For example, the lower the number, the closer to the original shape it will be. The higher the number, the more random the jump between the points.
Seed: Cycles random seed.
Ignore Grouping checkbox: When this preference is enabled, grouped objects will be treated as if they were ungrouped.
Apply button: Applies the Perturb effect to the selected artwork.
In this example we have a low distance, which means none of the points will move too far from their original position. But we have a high Crinkle value, meaning they will jump around all over the place and make this crinkled effect.
You can now use the Appearance Panel to click the Add Points effect that’s applied to adjust the number of anchor points on the path. You can do this just in case you want more or less crinkles in your stroke.
Now you have a choice, you can:
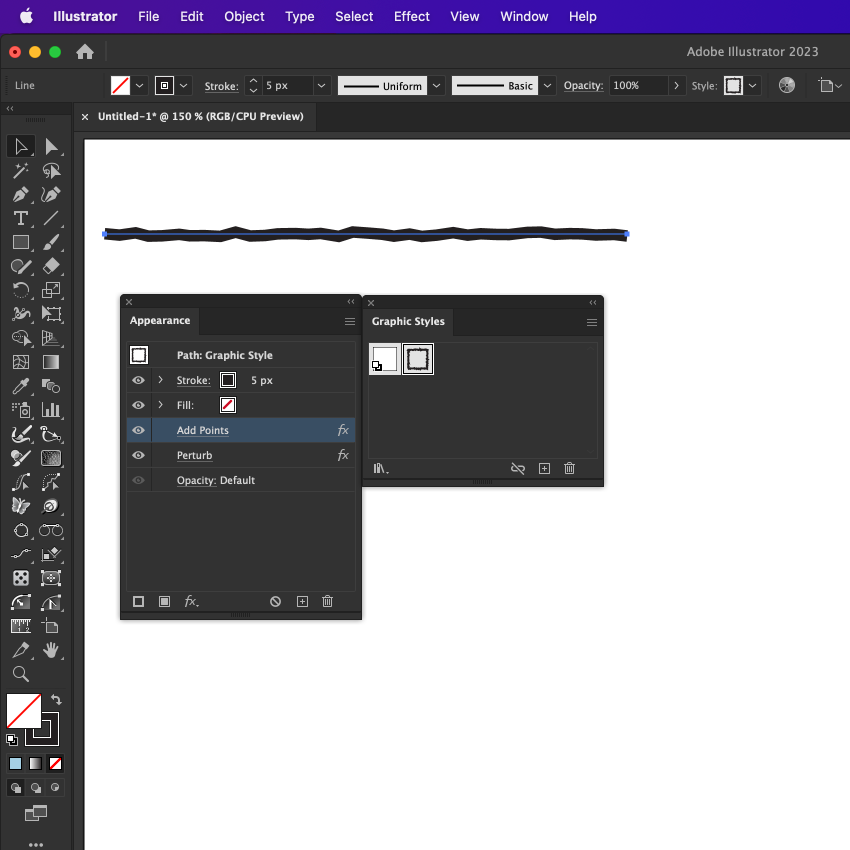
Save this stack of effects (that includes the stroke weight) into your Graphic Styles Panel, by either dragging it in, or clicking the plus icon in the Graphic Styles Window. This means that when it’s applied to any of your artwork, any fills or strokes you had will be removed and changed to the black stroke and weight you had to begin with (when you first made the style). Or...
You can remove the stroke and then save it to your Graphic Styles. In this case, if you want to apply this stack of effects to a group of objects (for example like a group of variable widths, as we’ll discuss further in a moment) then you only need to select the stroke in the Appearance Panel, highlight the stroke and then click the bin icon to remove it. Now when you save it to your Graphic Styles Panel, it will only save the 2 stacked effects (Add Points and Perturb).
Applying our linocut graphic style to a Width Stamp group of strokes
Next we will show you how to create a Width Stamp (part of the WidthScribe Plugin) and add it onto a gradient, before finally applying our new Linocut Effect Graphic Style.
Select the shape you want to add the lines to then Copy, and Paste it in Front. Select the top most object and apply a linear gradient (black to white). The black strokes will be the thickest and the white strokes the thinnest.
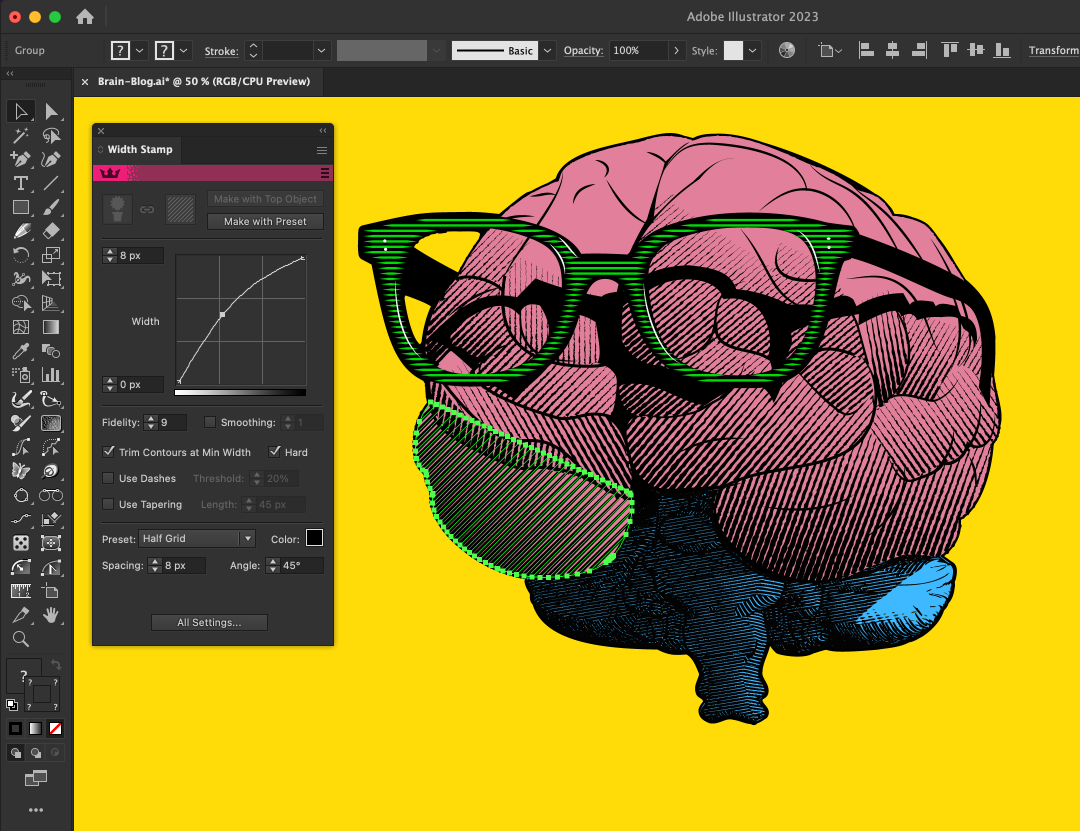
Open the Width Stamp Panel (Window > Astute Graphics > Width Stamp)
Next, use the Preset Half Grid from the drop-down menu, and click Make with Preset button.
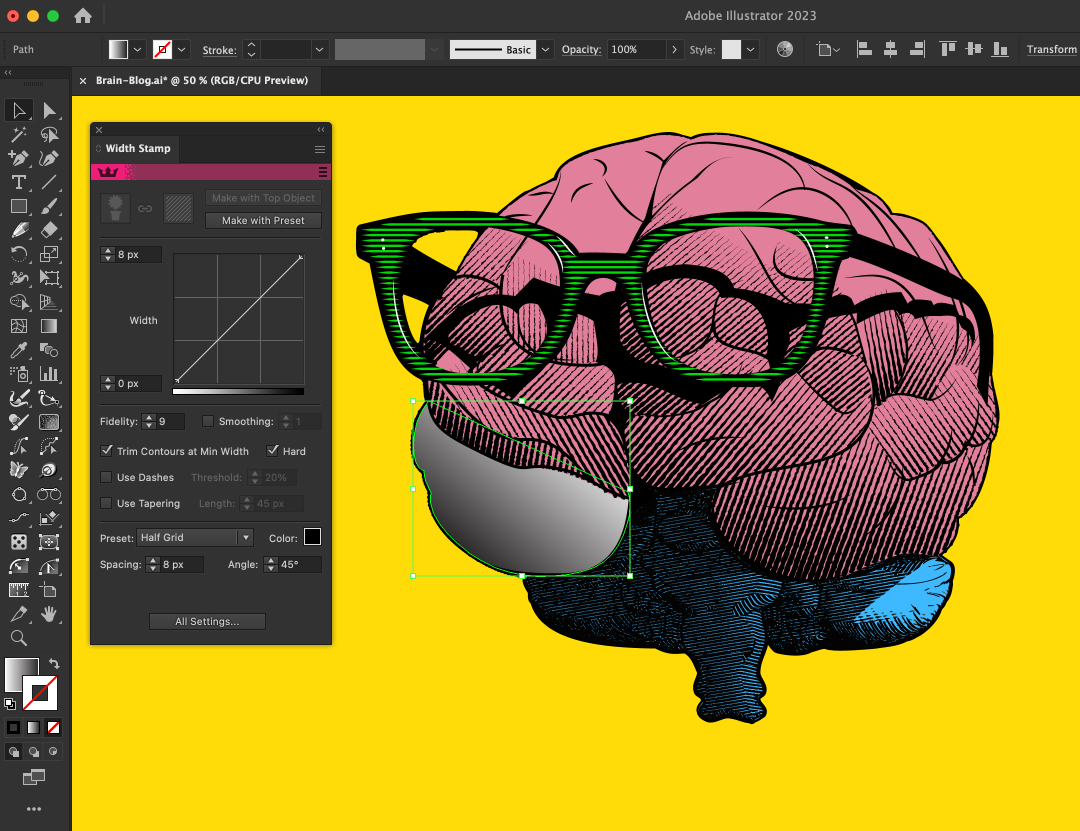
Now you can adjust the stroke weight parameters, change the variable stroke weight along the gradient, and adjust the angle and spacing of the strokes. You can also adjust the color output.

When you’re happy with the outcome, click the Expand Button at the top of the Width Stamp panel. This will expand them to be a group of strokes
You guessed it! All we have to do now is (with the group selected) click the Graphic Style we made earlier and you will have wonderfully crinkly linocut lines!
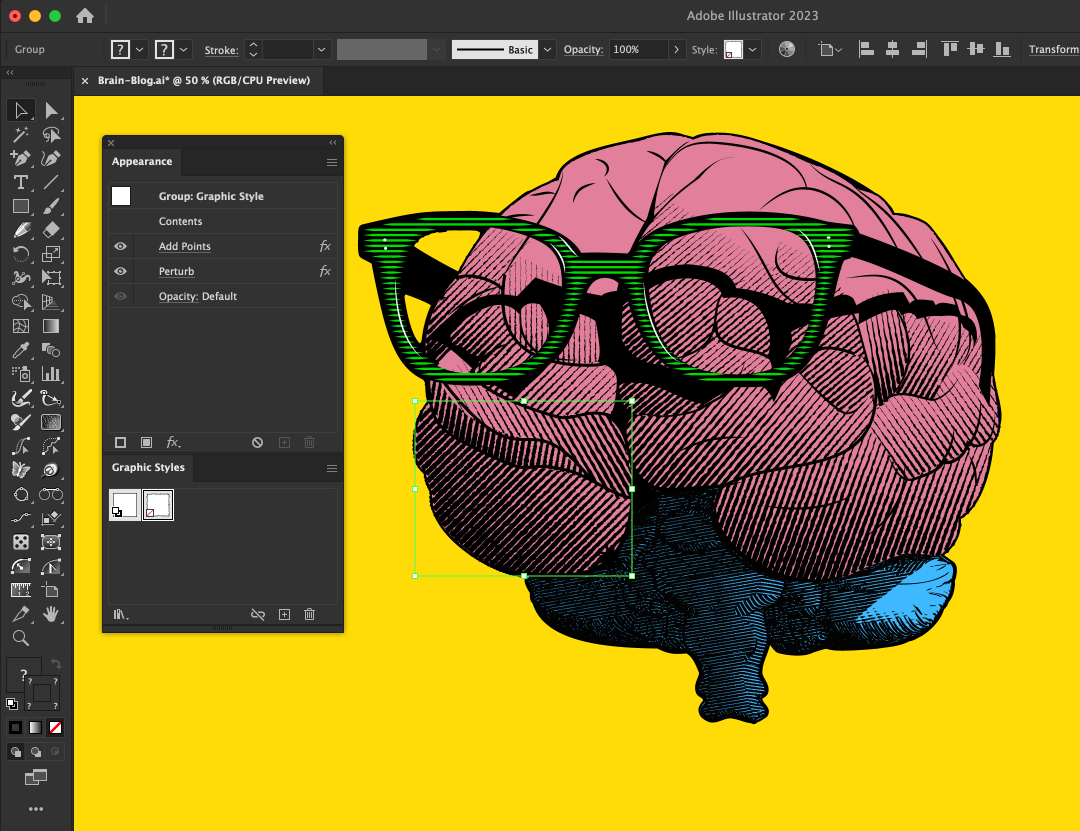
The great thing about non-destructive live effects like these, is that you can easily go back in and change them. In the Appearance Panel, click the Add Points effect and adjust the number of anchor points added to your path for less wrinkles. Or click the Perturb Effect and adjust the distance the anchor points are jumping around by. You can easily save this as a new graphic style, or create a new one and continue to add linocut lines to your artwork in Illustrator.